Tips for Lunar and Solar Photography
The sight of the full moon on the horizon, ominously floating, bloated and reddened, makes everyone reach for their camera at least once. Then when you look at the image, it seems small and not quite as impressive as you were hoping for. I’ve heard a few people over the years attribute this effect to atmospheric distortion magnifying the moon, but in reality, it’s an optical illusion. The apparent size of the moon doesn’t change at all, although the reddening is real. When light passes through our atmosphere, the higher wavelengths (blue) are more likely to be scattered by the dust in the air and the longer wavelengths less likely to be affected, which is also why the sky is blue! The reason we perceive the moon to be larger when it is on the horizon is that we are seeing it alongside distant things like buildings and trees, so psychologists tell us that we ‘know’ it is very large. When it’s high in the sky there’s no context, so it just looks like a small disc. If you don’t believe me, take a picture of the moon when it’s on the horizon, and then take another when it’s high in the sky. You’ll see for yourself.
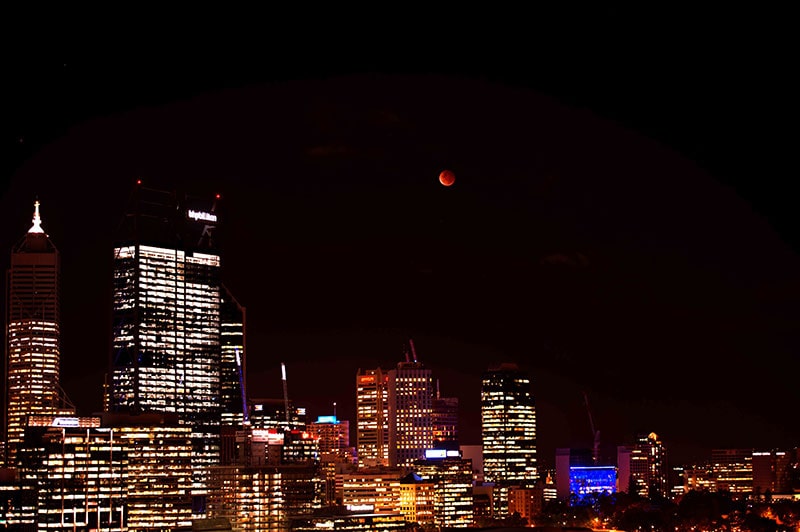
The other thing you notice is that the moon actually looks pretty small when using a normal lens. The size of the moon in the sky is about half a degree, so unless you use a pretty big telephoto lens you won’t see much of it. The following picture is of the eclipsed moon over Perth in late 2014, taken at a focal length of 70mm.
If you want to take a picture of the moon so that it takes up a reasonable amount of the camera frame you will need about 1000mm long lenses or more. Fortunately, you can get pretty good results using just about any telescope, and taking pictures of the moon is also the best way to start trying your hand at astrophotography. Main reasons are, it is so bright you don’t even need a tracking telescope. Also, it’s easy to find in the sky, and you can get some remarkably good pictures by switching to video and stacking in software.
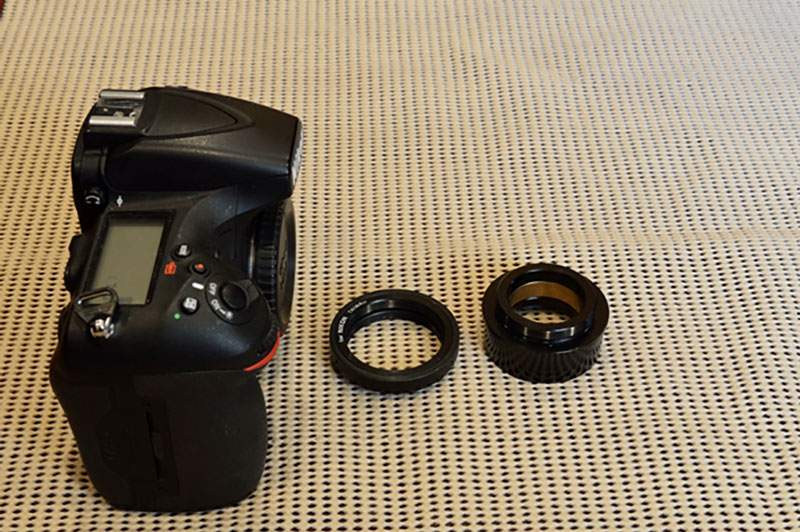
You will need to put your camera on the telescope, and the simplest way is using a thing called a t-ring adapter. In the good old days, camera manufacturers agreed on a standard thread that could be used for all lenses (it’s called a t-thread, for telephoto!), but once the bayonet-style lens connection was patented it was on for young and old, and the frustrating proliferation of different lens mounts and focal plane distances that limit us to one particular manufacturer occurred. You can pick these up for most makes of cameras at any astronomy retailer, and you’ll also need the eyepiece adapter that goes with it, so you can stick it in your telescope focuser. Here’s a picture of everything you need to put your camera into your telescope instead of the eyepiece.
The two rings screw together and will go on your camera in place of the lens. This one is for a 2″ focuser, but they are also available for 1.25″ eyepiece holders.
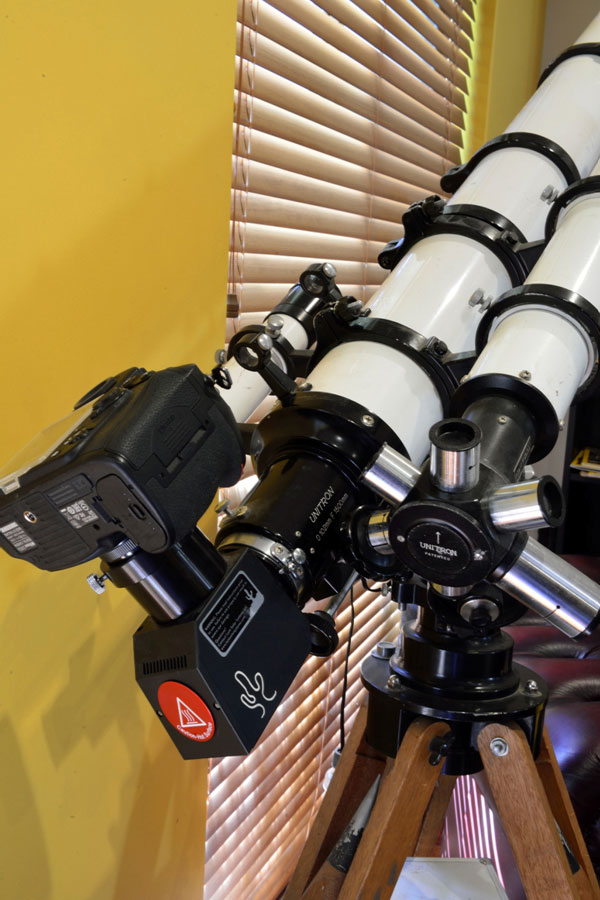
Here’s a picture of it altogether, and sitting on the end of my elderly, but thoroughly elegant 4″f15 Fraunhofer designed achromat. Despite its length, it’s quite skinny, and any 4″ telescope made in the last 20 years will have similar performance, although thanks to modern optical glass and coatings technology they no longer need to be so long to control the aberrations in the design.
Although this particular telescope is a cherished collector piece, it is very similar in performance and used to the sort of telescope most people are likely to have bought from the department store, or been given as a Christmas present, which is why I’ve used it for this article.
As a caution, if you are going to try putting a camera on one of the smaller reflecting style telescopes that are commonly available in retail store you might hit a snag trying to get to focus, as the focuser will not go in far enough. This can be fixed by moving the main mirror up the tube, or fitting a shorter focuser, or using an extra lens called a Barlow lens to magnify the image and push the focus point out at the same time. Although this sounds pretty drastic it isn’t so bad, and there are a few benefits to getting a reflecting telescope for photography.
One other thing to note is that the telescope in the picture is fitted with a rather special right angle prism on the focuser called a Herschel wedge (the black box with the red circle on it). This is one of the safe ways of looking at the sun with a small telescope, and can also be used photographically. But for moon pictures use a conventional star diagonal or remove it entirely if you need the extra back focus distance.
Once the camera is on there and focused, I have what is effectively a solidly mounted 1500mm telephoto lens. So setting the ISO to 200, and using 1/60th of a second exposure, I got this:
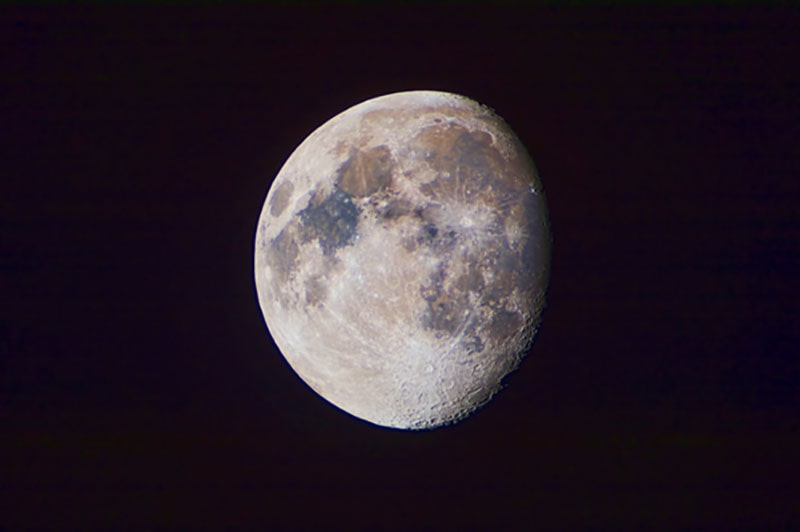
There are a few tricks to getting this result. I focused very carefully using live view on the camera screen at maximum zoom, and I used a remote trigger and a 3-second delay after the mirror had flipped up to make sure all the vibrations had damped out. I did have the tracking turned on, but it isn’t necessary at these shutter speeds.
You’ll notice the colours in the moon have been enhanced. I did this using a saturation adjustment in photoshop. What this reveals is the variations in chemistry and age of the different basalt laves within the lunar mare. The strongest contrast can be seen between Mare Tranquillitatis and Mare Serenitatis (sea of tranquillity and serenity respectively) which are the two approximately equal sized circular dark regions in the upper left quarter of the moon. The other features that are revealed beautifully during this phase of the lunation are the ray systems that surround the brightest and freshest crates of Tycho, Copernicus and Kepler.
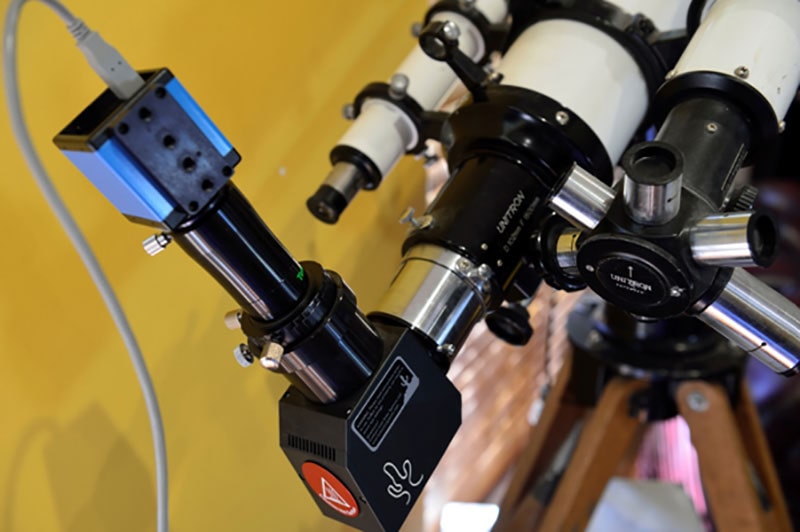
Can we do any better without buying a bigger telescope? Well, here’s an alternative that boosts the power by putting a Barlow lens on it. This makes the telescope effectively 2.5 times longer, and also has the advantage of pushing the point of focus out, so if you come up short with yours, you might want to look into this before making any modifications. I’ve also substituted a small video camera instead of a DSLR, because 1. I’ve got one, and 2. It’s a lot lighter than the DSLR. You could use a DSLR and record video to get the same result, but make sure all the fittings and connections are tight because plenty of expensive camera bodies have been bounced off the concrete when it all slipped and let go…
There are a few extra considerations with video, such as the amount of electronic amplification, shutter speed etc which are handled automatically by the DSLR, but the end result is a few hundred to 1000 video frames that record the same scene as the atmosphere blurs and stretches it. Using free video processing software (I use one called autostakkert 2) you can pick the best frames, align them, and get the software to average them all out and sharpen them.
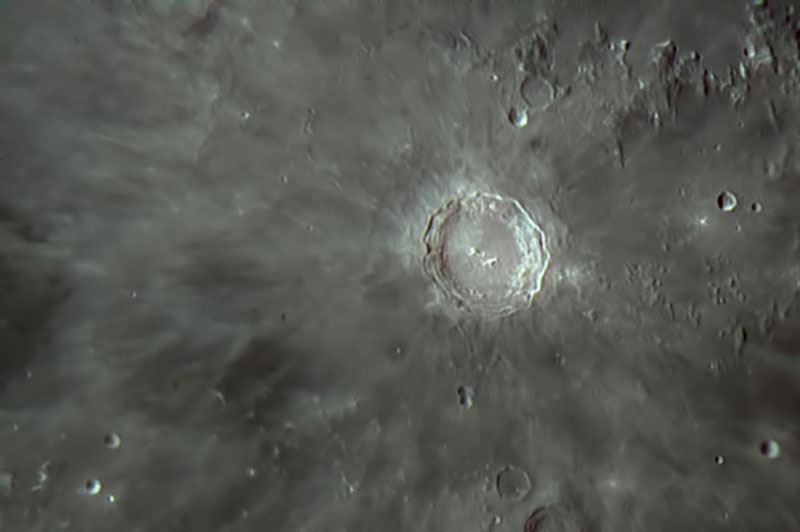
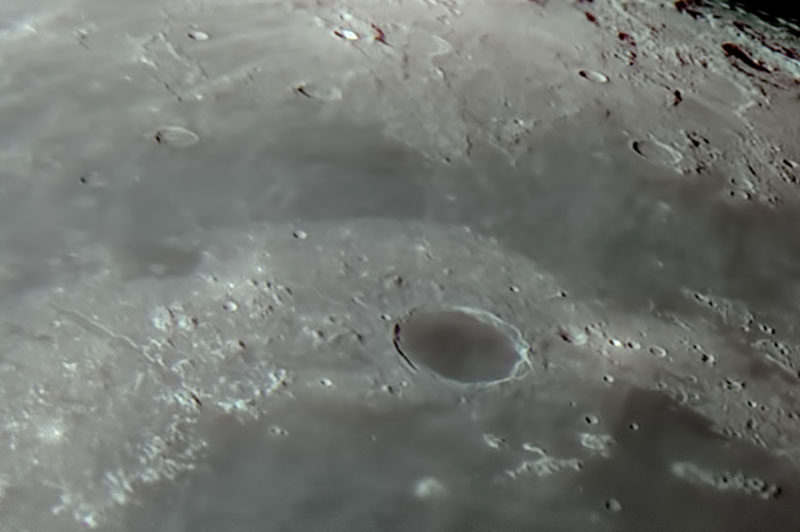
Here’s the crater Copernicus at an effective magnification of 75x through the same telescope (equivalent to a telephoto lens 3.75m long!). This is the very bright crater about 2/3 of the way up, and just to the right of centre in the full-scale moon picture.
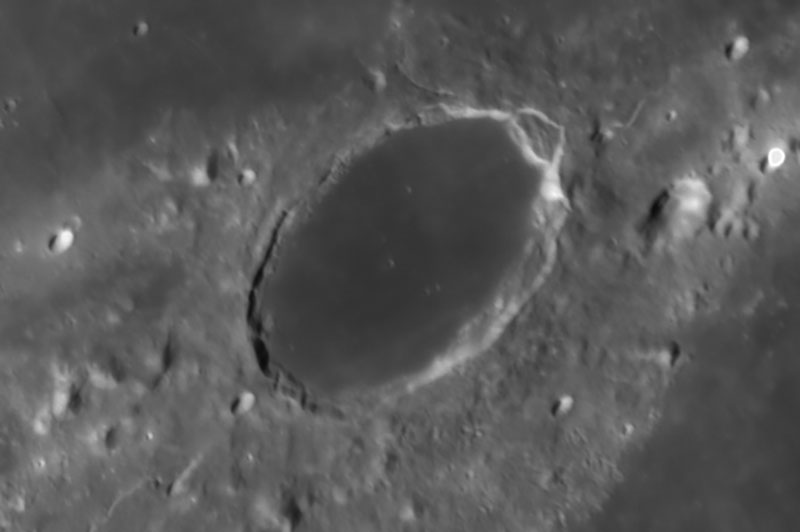
And as a final test, there are 7 small craterlets inside the large crater Plato, and these are generally used as a benchmark for superb seeing and great optics. Unfortunately, this night the test didn’t work out as none of them were visible.
Using my 25″ Newtonian and Barlow gives a focal length of 8m, and with the same camera and a bit of digital trickery Plato gives up its secrets! The smallest of these craters is about 250m across.
Earlier I mentioned that the Herschel wedge was a good way of looking at the sun. This target is so bright that it’s a bit of a problem, but at least it means we can keep exposures short and tracking is not a problem. One thing to be very cautious about when imaging the sun as well as looking at it through any kind of telescope is the heat is so concentrated that without the correct filtering you will potentially be blinded. The little screw in sun filters that came with older telescopes can crack in the heat, letting all that energy through to your eye.
Front element filters cover the front of your telescope with a film that rejects almost all of the incoming light, and these are very safe. The Herschel wedge, on the other hand, rejects heat at the business end of the scope, so they are generally only suitable on smaller refracting telescopes. They aren’t cheap and they also get very hot when you’re using them, so make sure it’s good quality before risking your eyesight. With a digital camera, you can use the LCD screen to make sure you’re never looking directly at the sun, but a CCD or CMOS chip will also be destroyed almost instantly by an unfiltered telescope.
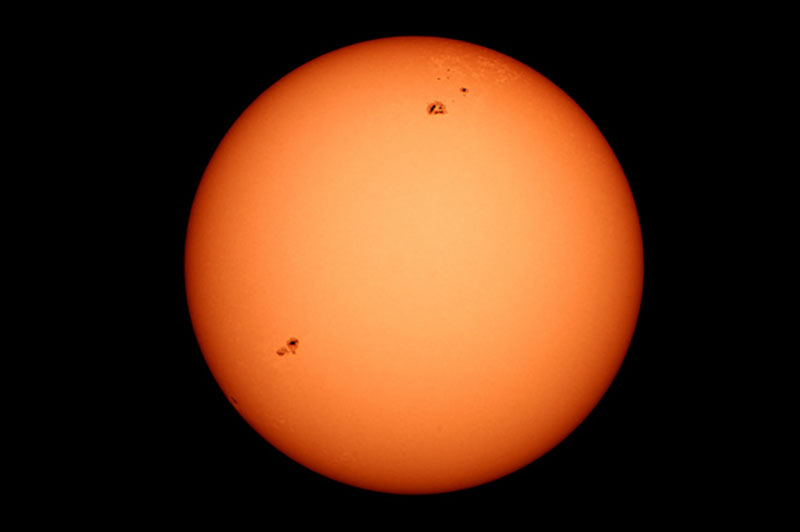
With a Herschel wedge on small 4″ telescope and a DSLR, exactly as shown in the third picture; here’s a white light image of the sun from November 2014 when there were still a few sunspots around. Note the white patches, known as faculae on the edges near the sunspots. The best part about solar imaging is that it doesn’t matter whether or not the moon is full, and it is done during daylight hours!
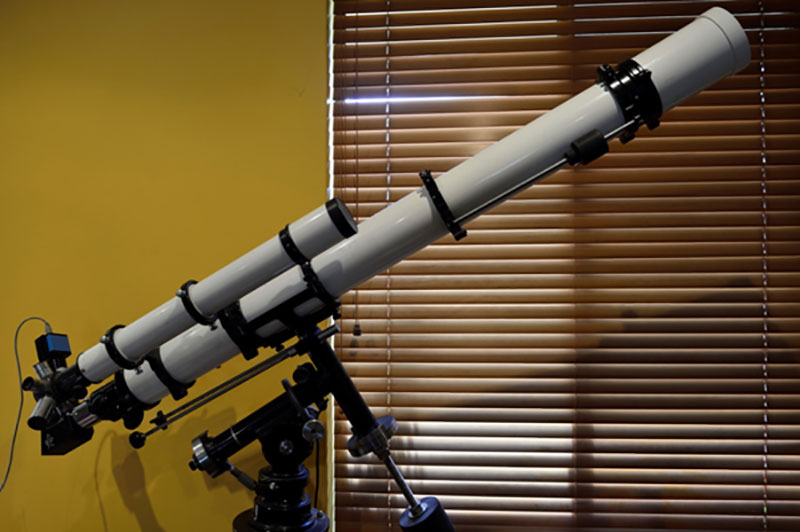
And just to finish off, here’s another shot of the star of this article: a 1960s Unitron photoequatorial 4″ f15. The optical design is 100s of years old, and there are no electronics to be seen, just old fashioned setting circles and mechanical slow motion controls. But the images in this article are proof that you don’t need to spend thousands of dollars on telescopes to get started photographing the moon and the sun.